Love this? Save it for later!
Share the inspiration with your friends
Introduction
“I wasn’t expecting to nail the perfect grilled steak the first time I fired up my old backyard grill,” I admitted to my friend over coffee one morning. You see, it was a random Sunday afternoon when I decided to try grilling steak, armed with nothing but a vague memory of a tip overheard from a restaurant chef years ago and a stubborn desire to get it right. The grill was a bit rusty, and honestly, I forgot to preheat it properly (classic rookie move). But that first sizzle, the smell of meat hitting the hot grate, and the little flare-ups made me realize this was going to be something special.
Maybe you’ve been there—wanting juicy, tender steak but intimidated by the thought of grilling. Or maybe you’ve burned more steak than you care to admit. Trust me, I get it. But after that first slightly chaotic attempt, I kept experimenting and tweaking, turning what started as a kitchen misadventure into a dependable, easy grilled steak recipe that just works every time.
Let me tell you, the secret isn’t about fancy marinades or complicated gadgets. It’s about understanding a few simple steps and respecting the meat’s natural flavors. This easy beginner’s grilled steak guide for juicy perfection is exactly what I wish I had back on that first try. It’s straightforward, approachable, and perfect for anyone wanting to impress themselves (or their guests) with a steak that’s tender, flavorful, and, most importantly, juicy.
Why You’ll Love This Recipe
After countless backyard grill sessions and some trial-and-error, this recipe has become my go-to for juicy grilled steak that never disappoints. Here’s why it stands out:
- Quick & Easy: Comes together in under 30 minutes, ideal for busy weeknights or last-minute barbecue cravings.
- Simple Ingredients: You don’t need exotic spices or marinades—just quality steak, salt, pepper, and a few kitchen staples.
- Perfect for Any Occasion: Whether it’s a casual dinner, weekend cookout, or a special celebration, this recipe fits right in.
- Crowd-Pleaser: Even steak novices rave about how juicy and tender the meat turns out.
- Unbelievably Delicious: The method locks in juices and maximizes flavor, creating that mouthwatering crust and tender interior combo.
What makes this grilled steak recipe different from many others? It’s the balance of patience, heat control, and simple seasoning that lets the beef shine without fuss. No fancy marinades, no complicated timing charts—just a few straightforward steps that give you steakhouse-worthy results. Honestly, it’s comfort food at its finest, without the stress.
What Ingredients You Will Need
This recipe uses simple, wholesome ingredients that deliver bold flavor and juicy texture without any complicated prep. Most are pantry staples, making this perfect for spontaneous grilling sessions.
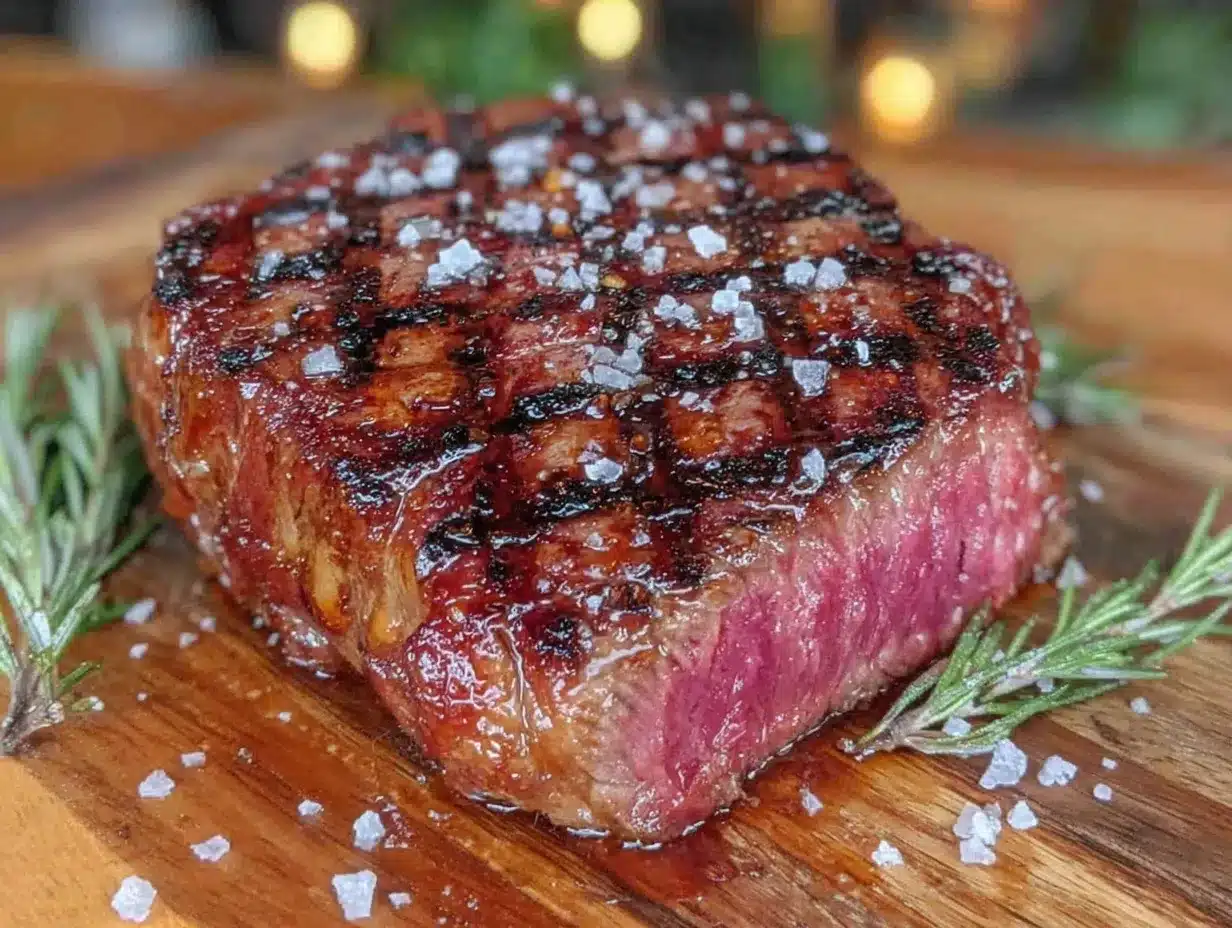
- Steak: 1 to 1 ½ pounds (450-680g) of your preferred cut (ribeye, sirloin, or New York strip are all excellent choices). I personally like using USDA Choice ribeye for its marbling and flavor.
- Salt: Kosher salt or sea salt (coarse grind preferred for crust development).
- Black Pepper: Freshly cracked for that sharp, aromatic bite.
- Olive Oil: 1-2 tablespoons, to lightly coat the steak before grilling (helps develop the crust and prevents sticking).
- Optional: Garlic powder or smoked paprika for a subtle flavor twist, but keep it light so the steak’s natural flavor stays front and center.
Pro tip: When selecting your steak, look for one with good marbling but not too thick. Around 1 to 1 ½ inches thick is ideal for even cooking. If you want a budget-friendly option, sirloin still makes a juicy, flavorful steak when grilled right. And if you ever want to try a garlic herb butter steak for a flavor boost, just let me know!
Equipment Needed
- Grill: Charcoal or gas grill works fine. I prefer gas for control, but charcoal adds that smoky edge.
- Tongs: Long-handled for flipping steaks safely without piercing the meat.
- Meat Thermometer: Highly recommended for beginners to avoid guesswork and nail the perfect doneness.
- Grill Brush: To clean the grates before grilling for a clean sear.
- Plate & Foil: For resting the steak after grilling to lock in juices.
If you don’t have a meat thermometer, no worries—there are sensory cues you can trust, which I’ll cover in the cooking method. For those on a budget, a simple instant-read thermometer from a local store can be a game changer and lasts for years.
Preparation Method
- Prep the Steak (10 minutes): Take the steak out of the fridge 30 minutes before grilling to reach room temperature. This helps it cook evenly. Pat the steak dry with paper towels—moisture is the enemy of a good sear.
- Season Generously: Rub both sides with olive oil, then sprinkle kosher salt and freshly cracked black pepper liberally. Don’t be shy—this forms that delicious crust. Optionally, add a light dust of garlic powder or smoked paprika.
- Preheat the Grill (10 minutes): Heat your grill on high until the grates are very hot—about 500°F (260°C). If using charcoal, wait until coals are covered in white ash. Clean the grates with a grill brush.
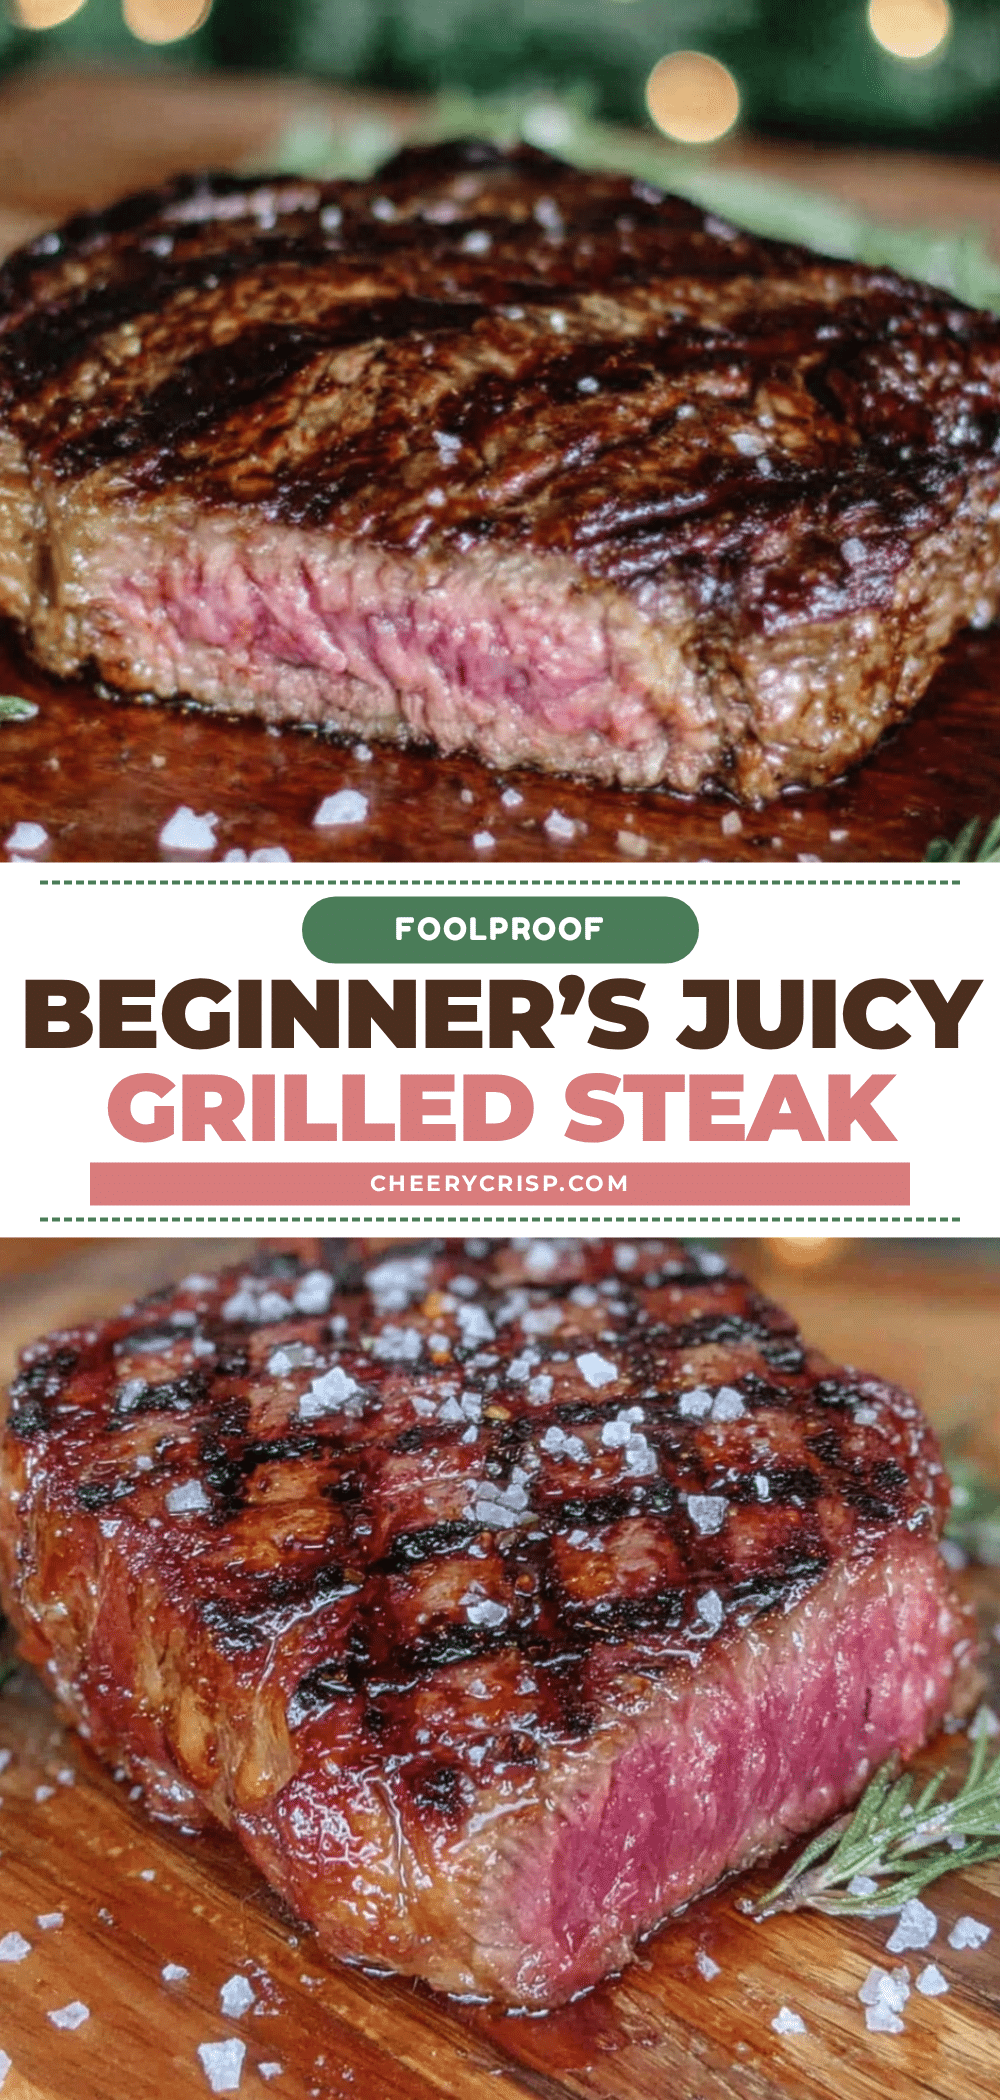
- Grill the Steak (8-12 minutes): Place steak on the hottest part of the grill. For a 1-inch thick steak: grill 4-5 minutes per side for medium-rare (about 130-135°F / 54-57°C internal temperature). Adjust time for thickness and preferred doneness.
- Flip Only Once: Resist the urge to poke or flip repeatedly. Let the steak sear and develop a crust before turning.
- Check Doneness: Use a meat thermometer or the finger test (touch the steak to gauge firmness). For medium-rare, it feels like the fleshy part of your hand beneath your thumb when relaxed.
- Rest the Steak (5-10 minutes): Transfer to a plate, tent loosely with foil. Resting is key—it lets juices redistribute, keeping the steak juicy.
Sometimes, the first few tries may feel a bit tricky—like when I forgot to oil the grates once, and my steak stuck like glue. But honestly, once you get the hang of preheating and timing, it’s foolproof. And if you want to try a different cut or thickness, just adjust grilling time accordingly.
Cooking Tips & Techniques
- Patience is Your Friend: Let the grill do its work. Don’t press down on the steak—that squeezes out juices and dries it out.
- Don’t Skip Resting: I can’t stress this enough. Cutting steak right off the grill is like opening a shaken soda—juices everywhere!
- Heat Zones: If your grill has hot and cooler spots, use them. Sear on the hot zone, then move to cooler side to finish cooking gently.
- Seasoning Simplicity: Salt and pepper is classic for a reason. Over-seasoning or heavy marinades can mask the natural beef flavor.
- Learn the Finger Test: If you don’t have a thermometer, this technique helps judge doneness by feel. It’s surprisingly accurate once you try it.
One time, I overcooked a steak because I got distracted by a phone call (story of my life). The result? Tough and dry. That’s when I really appreciated the thermometer. Also, always clean your grill grates—it helps avoid sticking and flare-ups that mess with your crust.
Variations & Adaptations
Want to switch things up? Here are some ideas to customize your grilled steak:
- Marinade Magic: Try a simple marinade with soy sauce, garlic, and a touch of honey for a sweet-savory twist. Marinate for 30 minutes max to avoid overpowering the beef.
- Herb Butter Finish: Add a pat of garlic herb butter on the steak right after grilling for extra richness.
- Dietary Adjustments: For a low-sodium option, reduce salt and boost flavor with fresh herbs like rosemary or thyme.
- Cooking Method: If you don’t have a grill, use a cast-iron skillet indoors to get a great sear, then finish steak in the oven.
- Seasonal Twist: Top with grilled seasonal veggies or a fresh chimichurri sauce for brightness.
Personally, I once tried finishing the steak wrapped in foil with a sprinkle of blue cheese—unexpected but delicious. It’s fun to experiment once you’ve got the basics down!
Serving & Storage Suggestions
Serve your grilled steak warm, sliced against the grain to enhance tenderness. It pairs beautifully with classic sides like roasted potatoes, grilled asparagus, or a fresh green salad. For drinks, a bold red wine or a cold beer complements the smoky, juicy flavors perfectly.
Leftovers? Store steak in an airtight container in the fridge for up to 3 days. To reheat, warm gently in a skillet over medium heat or in a low oven to avoid drying out. Let the steak rest briefly after reheating to keep it juicy.
Fun fact: flavors actually deepen after resting overnight in the fridge, making cold steak slices great for salads or sandwiches the next day.
Nutritional Information & Benefits
Per serving (about 6 oz / 170g steak): approximately 400 calories, 35g protein, 28g fat, and zero carbs. Steak is a great source of complete protein, iron, zinc, and B vitamins—all essential for energy and muscle health.
This recipe is naturally gluten-free and low-carb, fitting easily into many dietary preferences. Just watch added toppings or sides if you’re managing sodium or fat intake.
From a personal wellness view, I appreciate how steak provides sustained energy and satisfaction, helping me avoid mid-day crashes. Plus, it’s a fantastic way to get some quality nutrients without fuss.
Conclusion
This easy beginner’s grilled steak guide for juicy perfection is proof that with a little patience and the right technique, anyone can grill a steak that tastes like it came from a top-notch steakhouse. Whether you’re new to grilling or just want a reliable no-fail method, this recipe has your back.
Feel free to tweak seasoning or cooking times to suit your taste, and don’t be afraid to try different cuts or finishing touches. I love this recipe because it’s simple, satisfying, and always brings a bit of joy to the table—plus, it makes me look like a pro every time.
If you make it, I’d love to hear how it turns out for you. Drop a comment below or share your favorite steak variations. Let’s keep the juicy steak conversation going!
FAQs
What’s the best cut of steak for beginners on the grill?
Ribeye, sirloin, and New York strip are great beginner-friendly cuts due to their balance of tenderness and flavor. Ribeye is especially forgiving thanks to its marbling.
How do I know when my steak is done without a thermometer?
You can use the finger test to estimate doneness by comparing the firmness of the steak to the fleshy part of your hand beneath your thumb. It takes a little practice but works well.
Should I marinate the steak before grilling?
For this recipe, simple salt, pepper, and oil are enough to highlight the steak’s natural flavors. That said, a short marinade can add variety if you want.
Can I cook this steak indoors if I don’t have a grill?
Absolutely! Use a heavy cast iron skillet to sear the steak, then finish in the oven to reach the desired doneness.
How long should I let the steak rest after grilling?
Rest your steak for 5 to 10 minutes loosely covered with foil. This helps juices redistribute and keeps the steak juicy and tender.
Pin This Recipe!
Easy Beginners Grilled Steak Guide for Juicy Perfect Results
A straightforward and approachable grilled steak recipe perfect for beginners, delivering juicy, tender, and flavorful results with simple ingredients and easy steps.
- Prep Time: 10 minutes
- Cook Time: 8-12 minutes
- Total Time: 20-22 minutes
- Yield: 2 servings 1x
- Category: Main Course
- Cuisine: American
Ingredients
- 1 to 1 ½ pounds (450-680g) steak (ribeye, sirloin, or New York strip)
- Kosher salt or sea salt (coarse grind preferred)
- Freshly cracked black pepper
- 1–2 tablespoons olive oil
- Optional: garlic powder or smoked paprika
Instructions
- Take the steak out of the fridge 30 minutes before grilling to reach room temperature. Pat the steak dry with paper towels.
- Rub both sides with olive oil, then sprinkle kosher salt and freshly cracked black pepper liberally. Optionally, add a light dust of garlic powder or smoked paprika.
- Preheat your grill on high until the grates are very hot—about 500°F (260°C). If using charcoal, wait until coals are covered in white ash. Clean the grates with a grill brush.
- Place steak on the hottest part of the grill. For a 1-inch thick steak: grill 4-5 minutes per side for medium-rare (about 130-135°F / 54-57°C internal temperature). Adjust time for thickness and preferred doneness.
- Flip only once to let the steak sear and develop a crust before turning.
- Check doneness using a meat thermometer or the finger test (medium-rare feels like the fleshy part of your hand beneath your thumb when relaxed).
- Transfer steak to a plate, tent loosely with foil, and rest for 5-10 minutes to let juices redistribute.
Notes
Let the steak rest after grilling to keep it juicy. Use the finger test if you don’t have a thermometer. Avoid pressing down on the steak while grilling to prevent juice loss. Clean grill grates before cooking to avoid sticking.
Nutrition
- Serving Size: Approximately 6 oz (
- Calories: 400
- Fat: 28
- Protein: 35
Keywords: grilled steak, easy steak recipe, beginner steak guide, juicy steak, backyard grilling, steak tips