Love this? Save it for later!
Share the inspiration with your friends
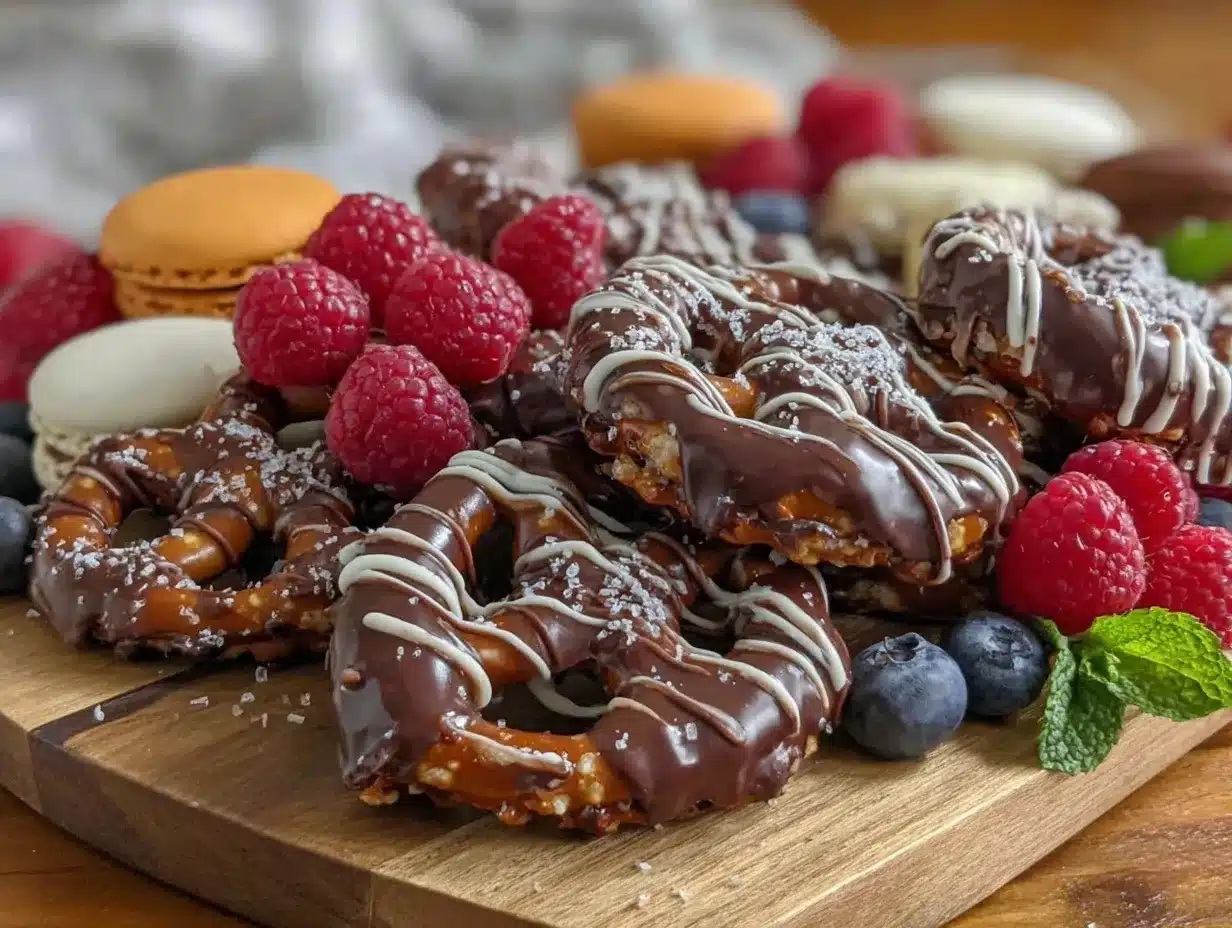
“You won’t believe how easy this turned out,” my cousin Jenna said, grinning as she unveiled the dessert charcuterie board at my nephew’s graduation party last Saturday. Honestly, I was expecting the usual spread of cupcakes and cookies tossed on a platter, but this was something else entirely. The colorful arrangement of bite-sized desserts, fresh fruits, and sweet treats looked like a masterpiece that belonged in a magazine.
That afternoon, the backyard was buzzing with laughter, and the warm spring air carried hints of caramel and chocolate from the board. I remember my nephew’s eyes lighting up the moment he spotted his favorite mini cheesecakes nestled between strawberries and chocolate-covered pretzels. It wasn’t just a dessert; it was a celebration on a platter. The best part? Jenna whipped it up in under an hour, even while juggling last-minute party prep and a toddler who refused to nap.
Maybe you’ve been there—scrambling to put together something festive that feels special but doesn’t eat up your whole day. This perfect graduation dessert charcuterie board is exactly that kind of recipe. It’s approachable, visually stunning, and bursting with variety to please every sweet tooth around. Let me tell you, after seeing how it brought everyone together, I’ve made this my go-to for any celebration that calls for a little extra sweetness and style.
Why You’ll Love This Recipe
After countless trial runs and party tests (including a few hilarious mishaps), this dessert charcuterie board recipe became a family favorite that I trust to impress without stress. Here’s why it might just become your celebration staple too:
- Quick & Easy: Comes together in under 45 minutes, perfect for last-minute party prep or spontaneous gatherings.
- Simple Ingredients: Uses everyday pantry staples and easy-to-find sweets—no scavenger hunts in specialty stores needed.
- Perfect for Celebrations: Whether it’s graduation, birthdays, or casual get-togethers, this board adds a festive flair.
- Crowd-Pleaser: Combines a variety of textures and flavors that kids and adults can’t resist.
- Unbelievably Delicious: The balance of creamy, crunchy, fruity, and chocolaty treats makes every bite exciting.
This isn’t just your average dessert spread. It’s a thoughtfully curated board where every element—from the silky chocolate ganache drizzle to the burst of fresh berries—works in harmony. Plus, the way it looks on the table gives you that “wow” moment without complicated steps. Honestly, it’s the kind of dessert that makes you close your eyes and savor the celebration vibe in every bite.
What Ingredients You Will Need
This perfect graduation dessert charcuterie board uses a mix of simple, wholesome ingredients to deliver bold flavor and satisfying textures without the fuss. Most of these are pantry staples or easy to swap based on what you have handy.
- Mini Cheesecakes: store-bought or homemade mini cheesecakes (I recommend Trader Joe’s for a quick option)
- Fresh Fruits: strawberries (sliced or whole), blueberries, blackberries, and grapes (seasonal berries add a fresh pop)
- Chocolate Treats: dark chocolate squares, chocolate-covered pretzels, and mini chocolate chips (Lindt or Ghirardelli bars work great)
- Cookies & Biscuits: mini shortbread cookies, biscotti slices, and graham crackers (use gluten-free options if needed)
- Sweet Spreads & Dips: caramel sauce, honey, and whipped cream (store-bought or homemade whipped cream with vanilla extract)
- Nuts & Crunch: toasted almonds, pecans, and pistachios (adds texture and a nutty flavor contrast)
- Marshmallows & Candies: mini marshmallows and assorted gummy candies (optional but fun for kids)
- Herbs & Garnishes: fresh mint leaves and edible flowers (for a touch of elegance and color)
For substitutions, you can swap fresh fruits depending on the season—peach slices in summer or pomegranate seeds in winter work beautifully. Almond flour cookies can replace regular cookies for a gluten-free twist. And if you want to keep it dairy-free, coconut yogurt mini cups or dairy-free cheesecake bites are excellent alternatives.
Equipment Needed
- Large Serving Platter or Wooden Board: A flat surface around 18×12 inches is ideal to arrange all the treats.
- Small Bowls or Ramekins: For dips, sauces, and candies to keep them contained and neat.
- Sharp Knife: For slicing fruits and cutting any larger desserts like brownies or bars.
- Tongs or Small Serving Spoons: Helpful for guests to pick up delicate items without mess.
- Cutting Board: To prep fruits and cookies.
If you don’t have a fancy wooden board, a large cookie sheet lined with parchment paper works just as well. For a budget-friendly option, a simple white ceramic platter can make colors pop beautifully. I find that using small bowls keeps sticky sauces like caramel from running all over the board, which is a lifesaver during parties.
Preparation Method
- Prepare Your Ingredients (10-15 minutes): Rinse and pat dry all fresh fruits. Slice strawberries and any larger fruits into bite-sized pieces. Toast nuts lightly in a dry skillet over medium heat for 3-5 minutes, stirring often until fragrant. This step boosts their flavor and crunch.
- Arrange Mini Cheesecakes and Cookies (10 minutes): Place mini cheesecakes spaced evenly around the board to anchor the layout. Surround them with clusters of cookies and biscotti slices for variety. Use the sharp knife to cut any oversized cookies for smaller bites.
- Add Fresh Fruits (10 minutes): Fill in gaps with colorful berries and grapes, grouping same fruits together for visual appeal. Don’t overcrowd—leave some space for dips and chocolate treats.
- Place Chocolate Treats and Nuts (5 minutes): Scatter dark chocolate squares, chocolate-covered pretzels, and mini chocolate chips around the board. Sprinkle toasted nuts in small piles to add crunch and texture contrast.
- Set Up Dips and Sauces (5 minutes): Spoon caramel sauce, honey, and whipped cream into small bowls or ramekins. Place these strategically where they’re easy to reach but won’t spill.
- Add Final Touches (5 minutes): Garnish with fresh mint leaves and edible flowers for a festive look. Add mini marshmallows and gummy candies if using, especially if kids are around.
- Serve and Enjoy: Bring the board out just before guests arrive to keep everything fresh. Encourage everyone to mix and match flavors—trust me, the combos are endless and delicious!
Pro Tip: If you’re prepping ahead, slice fruits and toast nuts a few hours early, but assemble the board right before serving to keep it looking and tasting fresh. Also, if your mini cheesecakes are refrigerated, set them out 10 minutes before serving so they soften slightly and taste creamier.
Cooking Tips & Techniques
Building a dessert charcuterie board sounds simple, but a few insider tips can take it from good to unforgettable.
- Balance Flavors and Textures: Aim for a mix of creamy, crunchy, sweet, and tart. For example, pairing a rich cheesecake bite with a tart berry and crunchy almond creates a satisfying mouthfeel.
- Mind the Colors: Variety isn’t just about taste—color draws the eye and whets the appetite. Arrange reds, blues, browns, and greens in clusters to create visual interest.
- Use Odd Numbers: When grouping items like cookies or fruits, use odd numbers (3, 5, 7) for a naturally pleasing arrangement.
- Avoid Overcrowding: Give each item room to shine. Crowded boards look messy and can make grabbing treats tricky.
- Keep Dips Contained: Use small bowls or ramekins for sauces and sticky candies to prevent mess and make dipping easy.
- Temperature Matters: Serve chilled items like cheesecakes slightly softened for best flavor and texture. Warm nuts before assembling to release aroma but cool before placing on the board.
One time, I forgot to toast the nuts for a big party and the board felt a little flat. Lesson learned—those little toasty bits add an unexpected punch! Also, multitasking by prepping fruits while the nuts toast saves time and keeps the momentum going.
Variations & Adaptations
This dessert charcuterie board is a flexible canvas, and I love playing around with it depending on the occasion or dietary needs.
- Gluten-Free Version: Swap traditional cookies and biscotti for gluten-free varieties or almond flour biscuits. Use naturally gluten-free chocolates and ensure dips are safe too.
- Vegan Adaptation: Use dairy-free mini cheesecakes or coconut yogurt cups, vegan cookies, and dark chocolate without milk. Fresh fruits and nuts remain the same.
- Seasonal Twists: In fall, swap berries for sliced apples, pears, and dried cranberries. Add pumpkin spice cookies or cinnamon almonds for cozy vibes.
- Flavor Boost: Add a sprinkle of sea salt on chocolate-covered pretzels or caramel sauce for a sweet-salty kick. You can also drizzle honey over fresh fruits for extra shine and flavor.
- Personal Favorite Variation: Once, I added mini lemon bars and fresh raspberries for a tangy contrast, and it got rave reviews from my dessert-loving friends.
Serving & Storage Suggestions
Serve this dessert charcuterie board at room temperature for the best texture and flavor. If chilled, let it sit out 10-15 minutes before guests dig in. Pair it with a crisp sparkling wine, coffee, or fruity iced tea to complement the sweetness.
Leftovers can be stored covered in the refrigerator for up to 2 days. To keep cookies crisp, store them separately in an airtight container. When reheating mini cheesecakes, avoid microwaving—let them soften naturally at room temperature.
Flavors tend to meld beautifully if you let the board sit covered for a few hours, so assembling a bit ahead can deepen the taste experience. Just keep delicate fruits and whipped cream chilled until serving time.
Nutritional Information & Benefits
This dessert charcuterie board offers a variety of nutrients thanks to its mix of fruits, nuts, and dairy. A typical serving (about 150g) contains approximately 300-350 calories, with moderate protein from cheesecakes and nuts, healthy fats from almonds and pistachios, and fiber from fresh berries.
The fresh fruits pack antioxidants and vitamins like vitamin C, while nuts contribute heart-healthy fats. Of course, the sweet treats add indulgent sugars, so enjoy in moderation. For dietary needs, swapping certain ingredients can make this dessert suitable for gluten-free or vegan diets.
Personally, I appreciate that this board balances indulgence with real food elements, making it a treat that feels both celebratory and mindful.
Conclusion
Creating the perfect graduation dessert charcuterie board doesn’t have to be complicated or stressful. With simple ingredients, a little planning, and a bit of creativity, you can put together a stunning centerpiece that everyone will love. Whether you’re celebrating a milestone or just want to add a special touch to any party, this board brings joy with every bite.
Feel free to customize the components based on your tastes and what’s in season—this recipe is as flexible as your imagination. I’ll admit, since that first family party, this board has become my signature celebration treat. It’s fun to make, beautiful to serve, and honestly, a total crowd-pleaser.
If you try it, I’d love to hear how you made it your own. Drop a comment below, share your favorite combos, or tell me about your own celebration desserts. Let’s keep the party going!
FAQs about the Perfect Graduation Dessert Charcuterie Board
Can I prepare this dessert board in advance?
Absolutely! Prep fruits and toast nuts a few hours ahead, but assemble the board just before serving to maintain freshness and appearance.
What if I don’t have mini cheesecakes?
You can use mini cupcakes, brownie bites, or even small fruit tarts as delicious alternatives that fit the board’s vibe.
How do I keep the cookies from getting soggy?
Store cookies separately until serving and avoid placing wet fruits directly on them. Use small bowls for sticky dips to prevent spills.
Is this dessert board kid-friendly?
Yes! Including mini marshmallows and gummy candies makes it fun for kids, but you can easily omit these for a more adult-friendly version.
Can I make this dessert board vegan?
Definitely. Use dairy-free cheesecake alternatives, vegan cookies, and dark chocolate without milk. Fresh fruits and nuts are naturally vegan.
Pin This Recipe!
Perfect Graduation Dessert Charcuterie Board

A visually stunning and easy-to-assemble dessert charcuterie board featuring mini cheesecakes, fresh fruits, chocolate treats, cookies, nuts, and sweet dips, perfect for celebrations.
- Prep Time: 15 minutes
- Cook Time: 5 minutes
- Total Time: 45 minutes
- Yield: 8 servings
- Category: Dessert
- Cuisine: American
Ingredients
- Mini cheesecakes (store-bought or homemade, e.g., Trader Joe’s)
- Fresh fruits: strawberries (sliced or whole), blueberries, blackberries, grapes
- Dark chocolate squares
- Chocolate-covered pretzels
- Mini chocolate chips (e.g., Lindt or Ghirardelli)
- Mini shortbread cookies
- Biscotti slices
- Graham crackers (gluten-free options if needed)
- Caramel sauce
- Honey
- Whipped cream (store-bought or homemade with vanilla extract)
- Toasted almonds
- Pecans
- Pistachios
- Mini marshmallows (optional)
- Assorted gummy candies (optional)
- Fresh mint leaves
- Edible flowers
Instructions
- Prepare your ingredients: rinse and pat dry all fresh fruits. Slice strawberries and any larger fruits into bite-sized pieces. Toast nuts lightly in a dry skillet over medium heat for 3-5 minutes, stirring often until fragrant.
- Arrange mini cheesecakes spaced evenly around the board to anchor the layout. Surround them with clusters of cookies and biscotti slices for variety. Use a sharp knife to cut any oversized cookies for smaller bites.
- Fill in gaps with colorful berries and grapes, grouping same fruits together for visual appeal. Avoid overcrowding to leave space for dips and chocolate treats.
- Scatter dark chocolate squares, chocolate-covered pretzels, and mini chocolate chips around the board. Sprinkle toasted nuts in small piles to add crunch and texture contrast.
- Spoon caramel sauce, honey, and whipped cream into small bowls or ramekins. Place these strategically where they’re easy to reach but won’t spill.
- Garnish with fresh mint leaves and edible flowers for a festive look. Add mini marshmallows and gummy candies if using, especially if kids are around.
- Serve the board just before guests arrive to keep everything fresh. Encourage guests to mix and match flavors.
Notes
Toast nuts just before assembling to enhance flavor and crunch. Assemble the board right before serving to keep fruits fresh and cookies crisp. Set refrigerated mini cheesecakes out 10 minutes before serving to soften slightly. Use small bowls for sticky sauces to prevent mess. For gluten-free or vegan adaptations, swap cookies, cheesecakes, and chocolates accordingly.
Nutrition
- Serving Size: About 150 grams per
- Calories: 325
- Sugar: 22
- Sodium: 150
- Fat: 18
- Saturated Fat: 7
- Carbohydrates: 35
- Fiber: 4
- Protein: 6
Keywords: dessert charcuterie board, graduation dessert, easy dessert ideas, celebration dessert, mini cheesecakes, fruit dessert board, party dessert